Pages

12.28.2007

Valentine's Mojo Monday!


I hope that you have all had a wonderful Holiday season! I've had a wonderful time with the boys this past month. This post is going to be super quick as I am taking the boys to McDonalds to run off some much needed energy (it has been super cold in CO and they are a little stir crazy)! LOL!


I made this for Julee's Mojo Monday sketch challenge # 17. I don't know why I always feel compelled to use Cat's Pajamas stamps for Julee's challenges (maybe because it was some of her fabulous card creations that turned me on to this line of stamps in the first place). If you have never visited her blog before, you're really missing out on some fabulous creations.


This card is so much cooler IRL! I wish it wasn't so hard to take photos of acetate cards. I stamped the Heart Circle, Medium Heart Circle and Small Heart Circle with White Staz-On on the acetate. I then stamped the Candy Box in Basic Grey on Rose Red cardstock. This was attached to the acetate with glue dots and then backed with Basic Grey cardstock from behind. I then stamped Cupid Kitty on Shimmery White cardstock and colored with watercolor crayons and my Copic Spica glitter pens. I cut this piece out with my Circle Nestabilities and then layered Pretty in Pink, Rose Red, and Basic Grey scalloped layers behind this piece. I then topped the white layer with some bling by Heidi Swapp. The sentiment is called I Love Mew! I then added some Cloud 9 Rain Dots randomly to the acetate layer.


Off to McDonalds!

12.13.2007

Monochromatic Thomas Kinkade

I made this for today's Ways To Use It Challenge over on SCS. The challenge was to make a monochromatic card. I need some "bulk" Christmas cards that can easily be mailed without a lot of extra postage and hassle from the post office. I think that this design is it. I usually really love to pile on layer after layer on my cards, so this is a HUGE departure for me and feels a little strange. In person the card is so much prettier and sparkly (the light to take pictures isn't the greatest on this cold Colorado afternoon). This is my one and only Thomas Kinkade stamp (so far). I fell in love with it when I first saw it debuted on Cornish Heritage Farms. I also used my Holiday Wishes sentiment set from Papertrey (the card is embossed both inside and out with Detail Silver embossing powder). The card base has been stamped with one of my favorite background stamps from SU (Linen).


Card Deets:
Stamp Sets: Village Christmas (Thomas Kinkade), Holiday Wishes (Papertrey), Linen (SU)
Cardstock: Bordering Blue, Brushed Silver, Papertrey Stampers Select White
Ink: Bordering Blue, Blue Bayou
Accessories: Silver Cord, Rectangle Nestabilities, Detail Silver ep

12.12.2007

Love Puppy

I absolutely adore how this card turned out! Should I have been making a Valentine's Day card? No...I still have a ton of Christmas cards to work on. However I needed a break from the Christmas card scene and when I saw the sketch challenge over on SCS, this idea immediately popped in my head. When the inspiration happens, you just have to put ink to paper, KWIM! LOL!


I don't know if you can see it, but I stamped the Small Heart Circle in Pretty in Pink in the background behind the puppy (stamped off once). Love Puppy was watercolored with a mixture of reinkers and Copic Spica Glitter pens.


Thanks for looking!


Card Deets:
Stamps: All by The Cats Pajamas (Love Puppy, I Ruff You, Small Heart Circle)
Cardstock: Regal Rose, Basic Black, Pretty in Pink, Shimmery White, Love Lines (Cloud 9 Designs)
Ink: Staz-On Black, Pretty in Pink, Regal Rose
Accessories: bling, Nestabilities, eyelets (Making Memories), Swirls embossing folder, Crystal Stickles

12.10.2007

Splitcoast Featured Stamper Challenge


I made this card for the featured stamper challenge over on Splitcoast. The featured stamper this week is LilLuvsStampin. Charlene has a beautiful gallery. I decided that I wanted to case this particular card. This was a card that she had made with a small group of stampers that like to challenge each other every week. I remember that this particular challenge yielded many beautiful cards (so much so that I wanted to play too)! Well, I finally played.

The object of the featured stamper challenge is to CASE a card, but to change up at least three elements. I kept the same layout (why mess with perfection). I did change up the color palette, stamps sets used, and the corner punch used while pretty much keeping to the overall feel of her card.

The base card is Bashful Blue (I'm still learning how to use my Photo Elements program...I obviously have a lot to learn when it comes to color hue). I then used the Simplicity punch on all four corners of my Papertrey white cardstock. I really loved the Polka Swiss patterned paper used on the original card, so I used my Polka Dot backgrounder from SU to try to make my own. I stamped the backgrounder using White Craft ink on cardstock weight vellum, and then embossed with detail white embossing powder. I then used my Antique Linen distress ink pad dtp to grunge up the paper a little bit (to match the feel of the designer paper that I had chosen). The next layer is used Figgy Pudding paper from Basic Grey layered on Bashful Blue. The focal image is a retired SU set called Lace Snowflakes (I'm a sucker for Snowflake stamps). I stamped the snowflakes with White Craft ink and embossed with Winter Wonderland embossing powder. These snowflakes sparkle so much IRL! I layered this on top of white cardstock. The ribbon is some of the new Bashful Blue taffeta from SU. I then added a chipboard snowflake (by Making Memories) that I had also covered with White Craft and Winter Wonderland embossing powder to the bottom left. There is a blue rhinestone brad in the center.

Hope you like it!

12.09.2007

Long time no post


I finally stamped!! Sorry for the long delay between posts. Life has really just been smacking me hard lately. I was laid off from work on November 14th after being with the company I worked with for 10 1/2 years. I'm making the best of it and have been enjoying spending time with my two boys. I figure that I'll start looking for new employment opportunities at the beginning of next year (after all, when will I EVER have time to take the whole month of December off again?). I also have a case of Bronchitis that just seems to not want to go away. I guess I really have no excuse NOT to stamp every day if I wanted to. I swear, I almost feel busier now that I'm not working. LOL! My house has never been so spotless!

I made this for Julee's Mojo Monday Sketch #14 on her blog Poetic Artistry. Julee has some awesome weekly sketch challenges that are just perfect for kick starting your Mojo (or lack of in my case). She also is a super talented stamper and the creative genius behind a new line of stamps (Verve Visual). Please check out her blog if you have never seen it. I promise you won't be disappointed.

My Mojo was seriously lacking last night. If you only knew how many pieces of my precious Shimmery White cardstock made it into the circular file, you would know how lacking my Mojo was. It could also be that I was very distracted by a playful Lab puppy who kept retrieving things for me (i.e. stuffed animals from the beds of my children, glass ornaments from the Christmas tree, etc.). If my cat Rocky would let him, I swear that he would bring Rocky to me. Anyway, what do you think of my first card in what feels like months?

Stamps:
A Winter Song (Elzybells), Snowflake Serenade (Papertrey), Punch Pals (SU)
Cardstock:
Pretty in Pink, Regal Rose, Kraft, Shimmery White
Ink:
Soft Sky, White Craft, Staz On Timber Brown
Accessories:
Nestabilities, Hero Arts rhinestones, WWC, Icicle Stickles, Snowflake embossing folder

10.25.2007

Wanna see something cute?

This is Shadow. He is now a little over three months old. He is named Shadow because he literally is my shadow as he is always following me around (that is when he is not terrorizing the cat). LOL! He thinks that he is a lap dog (I doubt that he will grow out of this phase) and will often stare at me until I let him up on the couch or bed with me (often whining or barking to make his point). He is 100% spoiled rotten and will often go upstairs to the boys room to make off with a toy of some sort. His favorite place to stash and hide all his toys is behind the couch (he must think it is a little cave or something). He is adorable and has already made his way into all of our hearts!



10.20.2007

Santa Baby....


I made this for Beate's weekend sketch challenge that she has over on her blog. I don't know about you, but I love it when part of the work is already thought out for me! She has awesome sketch challenges...well really awesome everything. If you've never visited her blog, I highly encourage you to go and check it out.

I had originally inked up and colored the Santa for the Thursday Ways to Use it Challenge over on Splitcoast. This challenge was WT135 Bling! Bring Out the Glam. Santa had been sitting on my desk all colored in and glittered up, but I just couldn't figure out what to do with him. To the rescue, Beate's sketch.

Santa is colored in with watercolor crayons on SU's watercolor paper using an aquapainter. I really am liking the white crayon for the beard and hair, it really makes a difference. I then used some Hero Arts Prisma glitter to make him all sparkly. The sparkle in his blue eyes comes from my Copic Spica glitter pens that I purchased from Ellen's store. I then outlined the entire panel with some Martha Stewart White Gold glitter. I like how it lends an Old World feel to the piece. The panel is then matted on a shimmer ruby CS that I picked up at Archivers. The card base is Soft Sky inked up with my Linen background. I then stamped snowflakes from the SU Snow Burst set in Soft Sky and River Rock. The patterned paper piece is Basic Grey Fruitcake. The sentiment is from one of the newer Papertrey stamp releases. It is from their Holiday Wishes set. Last but not least, the snowflake is a new Spellbinders Snowflake Wonder die that I picked up (also from Ellen...she has been seeing a little of my hard earned money lately :-) ). I used a rhinestone brad to layer three of the snowflakes together and then used Waterfall and Crystal Stickles to make it all sparkly.

Hope you enjoy!

10.09.2007

Birthday Sprinkle


I made this card for the Technique Lover's Challenge over on SCS (TLC137). The challenge was to make an acetate card. Since I'm the one who authored the tutorial, I figured I better participate (LOL)!

The card base is 5 1/4 in square. I stamped various images from Polka Dots & Petals in Staz-On Cotton White randomly on the front of the card. I then layered a strip of designer paper (Salsa Celebrations from Junkitz) to the front of the card. The whisper white piece is matted behind the dp on the opposite side of the acetate (think of the acetate as the Oreo cream filling. The dp is the front of the cookie sandwich, and the whisper white is the back of the sandwich).

Sprinkle and Little Party Hat (both from The Cat's Pajamas) is stamped on Shimmery White cardstock. Sprinkle is watercolored with crayons and then I went over with my Copic Spica glitter pens. She is so shimmery IRL! I used my new Nestabilities Circle to cut and emboss Sprinkle out and then matted this with a Nestabilities Petite Scalloped cut from Only Orange. My only regret with the Nestabilities is that I only ordered the Circles. I want them all now (yikes...baby steps Linda...baby steps). To this I added some Heidi Swap bling and a few Prima's with a MM Rhinestone Circle brad in the center. The back of the card is made with the same "Oreo" sandwich style. I used Shimmery white for the inside Circle and then matted with a Shimmery Kiwi cardstock that I found at Archiver's. The biggest challenge with this card was lining up all those pretty scallops just right. :-)
To finish off the card, I tied some pretty Polka Dot sheer ribbon.

This card will be going out to someone who recently had a birthday (unfortunately, I'm late). I'm hoping she will enjoy it...I certainly enjoyed making it.

10.08.2007

Frankie - Sketch Challenge

I made this for SC143 over on Splitcoast. I really was loving all of the cards that I saw made with this particular sketch. I realized I haven't made any Halloween cards yet this season, so I thought that I would get my one of my favorite sets from last seasons Holiday mini all inky again. I love to watercolor so the Best Fiends set was a natural for me to purchase.

I stamped Frankie with Staz-On Black on watercolor paper and used my watercolor crayon and an aquapainter to color him in. I still have quite a ways to go before I will be happy with my watercoloring, but I have come a long way from my first watercoloring attempts. I highlighted certain areas of Frankie with my Copic Spica glitter pens (I so wish you could see the sparkle). Once Frankie was colored in, I sponged some Vintage Violet (one of last years "In" colors) all around the edges of the watercolored piece. I used my ticket corner punch on both the watercolored layer, as well as the Pumpkin Pie layer, and then layered both of these on a Lavender Lace piece. The card base is made from Vintage Violet. To this, I added a Basic Grey (one of this years "In" Colors) layer stamped with the new Sanded background in Basic Black. The horizontal layer is a Martha Stewart ribbon tape from her Halloween collection (this stuff is uber cool). The next layer is some sparkly Glitter paper from the K & Company 2007 Halloween Line. I felt like the piece still needed "something" so I punched a bat shape from Basic Black cardstock with my Martha Stewart bat punch. The bat is covered with Black mica powder to make him super sparkly. I'm trying to save up for a nicer digital camera. I would love to be able to better capture the sparkle of my work a little better (in addition to the antics of my two very active young children). Hope you enjoy!


Stamps: Best Fiends, Sanded
Cardstock: Vintage Violet, Basic Grey, Pumpkin Pie, Lavender Lace, K & Company (dp)
Ink: Staz-On Black
Accessories: Martha Stewart ribbon tape, Martha Stewart bat punch, Copic Spica glitter pens, Ticket corner punch, black Mica powder


10.07.2007

Casing SweetMissDaisy


I just finished making this card for the Featured Stamper Challenge over on Splitcoast. The featured stamper today is SweetMissDaisy. Anna is one of my stamping idols. When I think of what sets Anna apart, the first thing that comes to mind is her coloring skills. Other things that I can think of is that her style can go from whimsical to elegant in the blink of an eye. She has a wonderful flair for using patterned paper and she is great at doodling too (she is one of the artists for Whipper Snapper stamps). She is also an uber talented photographer. Did I mention that she is one of my idols?

Anna is solely responsible for my purchasing this particular stamp set. When I saw the two cards that she made in her SCS gallery with the Jolly Holiday set, I was a goner. Here is a link to the specific card that I cased. If you have never seen Anna's work, I encourage you to go check out her blog.

Card Details:
Stamp: Jolly Holiday
Paper: Soft Sky, Watercolor, Deck the Halls dp (Making Memories)
Ink: Staz On Black
Accessories:
Watercolor crayons, Aquapainter, Ribbon (Deck the Halls - MM),
Hero Arts
Snowflake, Sakura Stardust pen, Copic Spica glitter pen.

10.05.2007

I could stamp all night....

I was desperately counting down the Fall/Winter release for The Cat's Pajamas. I was super lucky and won this clear stamp set from Karrie's blog. This image of Sprinkle has got to be one of my favorites.


I made this card for a swap that I was lucky enough to participate in (some of my stamping idols were in this swap :-) ). I really wanted to make my card special and I hope that I didn't dissapoint any of the ladies that I swapped with. I used one of Julee's wonderful card sketches for inspiration. If you have never been to Karrie's or Julee's blogs, I highly recommend it. These gals stamp like a dream!

The card base is Soft Sky (this has to be my new favorite "In Color". The patterned paper is made by Making Memories. It is from their Deck the Halls holiday line (Diagonal Stripe). I embossed a panel of Whisper White with my Snowflakes Cuttlebug embossing folder. Sprinkle is stamped with SU Basic Black on Shimmery White. I first watercolored and then went over with my Copic Spica glitter pens. I used Xmas Red Stickles on the Candy Cane. She shimmers so nicely...I really wish that the picture could capture the shimmer. I used my Giga scalloped punch on a metallic Kiwi cardstock made by The Paper Company (like Shimmery White except in a beautiful green similar to Wild Wasabi). The sentiment is stamped with Wild Wasabi on Shimmery White. I used the new SU corner rounder on all four corners and then matted this with a slightly larger green piece. I found these wonderful little snowflake sequins at a local scrapbooking store and thought that they would be the perfect embellshment to top everything off.


Stamps: TCP Kitty
Christmas, Poochie Christmas

Paper: Shimmery White,
Soft Sky, Real Red, Kiwi Metallic (The Paper Company), Whisper White,
MM Deck the Halls Diagonal Stripe

Ink: Basic Black, Wild
Wasabi

Accessories: Snowflake
embossing folder, Giga Scalloped Punch, Xmas Red Stickles, Copic Spica glitter
pens, Ticket Corner Punch, Snowflake Sequins, Corner Rounder


10.01.2007

Almost back in da' house!

My husband and I received good news today. Our computer was able to be fixed and all of our pictures were able to be saved! You do not know how incredibly happy this makes me feel. I am so going to be backing up all those pictures to disk and better yet...getting them printed so I can do some scrapbooking.


I have so missed posting on SCS and here on my blog. I've made a "couple" of cute things that I'll finally be able to share with you. One really doesn't realize how much you rely on something as simple as a computer for enjoyment.


Thanks for sticking it out with me!


Linda

9.07.2007

Swapping with Jami

Hello everyone! Long time, no post. My regular computer is still broken. My husband discovered that one of our sons placed a nickel in one of the CD drives. We think that this is what made the computer go caput. We're still looking into option to hopefully rescue pictures so we're holding off on purchasing a new hard drive until then. All I can say is that I never realized how much I appreciated my old computer until I had to start using this old laptop. I really have missed uploading my creations (there isn't a port that I can plug my digital camera into on this laptop). Maybe I'll start sending out tons of RAKs and just beg people to take a picture and send me an attachment via e-mail (that's what I had to do with this one...Jami was gracious enough to take the picture for me). I'll find a way to post one way or another. :-)


The above card uses one of the new SU sets from the Holiday Mini. It is called Snow Burst and I absolutely love it! I also find room in my stamp stash for sets with snowflakes, snowmen, or flowers. I stamped the swirl from the SU Priceless set on the Soft Sky card base and then heat embossed with Detail White embossing powder. The main image snowflake panel starts out with Shimmery White cardstock and has all of the snowflakes from the Snow Burst set randomly stamped with Soft Sky or Encore Silver ink. I then overstamped this panel with some of the snowflakes inked with Versamark. I then embossed these snowflakes with Iridescent Ice embossing powder. I wish you could see the subtle shimmer that this little touch adds to the panel, but the picture just doesn't quite pick it up. The sentiment panel is also Shimmery White cardstock. I stamped one of the sentiment from the SU Glad Tidings set in Soft Sky. I then attached sticky strip to all four edges and then covered the sticky strip with clear micro beads. I love how this gives yet another icy edge to this card. Both the snowflake and sentiment panel were matted with Blue Bayou and Brushed Silver cardstock. The snowflake attached to the upper left corner was stamped in Encore Silver and then embossed with Iridescent Ice ep. There is a clear rhinestone brad in the center from the Pretties kit.


Hope you like it!


Linda

8.22.2007

Acetate Card Tutorial

For those of you who have been waiting for my Acetate Card Tutorial, I wanted to let you know that it is up over on Splitcoast. I'm still having computer woes or I would post a picture of the finished sample here on my blog. You can see it on Splitcoast though (what a challenge it was getting those pics too). I so miss my regular computer. So much for Norton, as my computer got a virus and some. At this point, we're just hoping that we can retrieve all of our digital pictures of the family. We've been meaning to backup the pictures to a CD, but have been putting it off. The best lessons in life always come from the school of hard knocks, but this lesson is particularly hard.

I'm working on a swap for Jami for the upcoming SU Holiday mini. Jami is always nice to offer to take a picture of the card and e-mail it (in case you forgot to take a picture before sending it on its merry way). At least I know that I'll be able to post a picture of that here eventually. So far I'm really liking it. It uses the new Snow Burst stamp set (I always treat myself to a Snowflake set if I like it) and so far, I'm liking what I've come up with. The hiatus from the computer at least is letting me get in the stamp room a little more. :-)

Anyway, please go check out the tutorial on Splitcoast and upload a card or two. I would love it if you would send me an e-mail with a link to your card. I know I will enjoy seeing what you create!

8.17.2007

Out of Commission

I wanted to let everyone know the reason why there hasn't been any blog postings for a little while. My computer at home went caput (I'm at work typing this). We've got the hard drive out for repair, so hopefully I'll be able to post some cards and projects soon. :-)

Linda

8.07.2007

DTGD A Lighter Shade of Pale


This is the card that I made for JanTink's DTGD challenge over on Splitcoast. Would you believe that I didn't even give this set a second glance when I first went through the catalog? Then I saw a beautiful card by JanTink, and then by Julia S, and then gorgeous creation after gorgeous creation by Jenn Balcer. Oh my idols...my pocketbook would be so much more plentiful if it wasn't for them. The layout of this card is largely inspired by one that Jenn Balcer did. Please go check out her blog if you've never heard of her. I promise you won't be dissapointed.


This is a standard sized card with about one inch cut off the right hand side. The colors used are Naturals Ivory (card base), Soft Sky, and Very Vanilla. I stamped the Tres Chic background stamp in Soft Sky on the Very Vanilla. I mounted this to a Soft Sky mat and pierced around the edges. This panel was mounted on the Naturals Ivory base that was stamped with the swirls from Priceless. I also did a little DTP on the Naturals Ivory base and some sponging on the Very Vanilla panel with Soft Sky. I LOVE this new color. Prior to mounting the panel, I also punched the corner with my double rectangle punch and tied some Vanilla Organdy that I dyed with my Soft Sky ink pad.


The main flower image from Fabulous Flowers was stamped with Soft Sky ink on Soft Sky paper four times and cut out. I used Martha Stewart's White Gold glitter (love the vintage patina of this glitter) all around the edges. Each cut out panel is mounted with dimensionals for some pizzaz. Some rhinestones finish off the flower center. I mounted the flower in the lower right corner of the cut off panel. After I had this all assembled, I felt the card still was missing something. That DIRTY something! So what is a girl to do but part with some of her stash? Ahhh...parting is such sweet sorrow. I LOVE how the stick pin looks with the pearls and crystals but now feel I must purchase a whole new "Virgin" Pretties kit to hoard and covet. :-)

Swapping with Jami


I received an invitation from Jami (known for running a tight swap) to join in on her New Catty Swap. Jami has some of the best swappers participate (a LOT of my stamping idols), so I jumped at the chance to join in. The only downside to swapping with some of your stamping idols is the sheer nervousness that follows worrying about whether your work will be up to snuff. Anyway...here is what I made using the new Stamping Up set Haunting Halloween. This is a Surprise Pop-Up slider card that I learned how to make over on Splitcoast. This is a super easy WOW technique that Beate Johns wrote a tutorial on. Give it a try, it really is fun!

I used the new Basic Gray SU cardstock, along with Only Orange, Lovely Lilac, Green Galore, and Shimmery White. I stamped the star background and the steam coming from the Cauldron using Craft Black and then embossed over this with Hologram Highlights embossing powder. Sparkly! I watercolored the cauldron with my watercolor crayons. The little frog has googlie eyes for a little pizzaz. The contents of the Cauldron and the stars in the steam have Martha Stewart glitter. The sides are held together with a bunch of eyelets that I set with my Crop-O-Dile (love this tool)! Here is a view of the Pop-Up. Enjoy and thanks for visiting!

Supplies:
Stamp: Haunting Halloween
Cardstock: Basic Gray, Shimmery White, Only Orange, Lovely Lilac, Green
Galore

Ink: Craft Black, Staz-On Black, Lovely Lilac
Accessories: Hologram Highlights EP, Bold Brights II Eyelets, Basic Eyelets, Watercolor
crayons, Google Eyes, Martha Stewart glitter, Round Tab punch.

7.29.2007

Dare to Get Dirty Easy Elegance

Here is a card that I made for one of the Dare to Get Dirty challenges over on Splitcoast. This is for the Easy Elegance challenge given by NoTimeToStamp (don't you just love her name?).

I don't know what is more elegant than Fabriano Mediovalis folded reply cards. After all, her Royal Rubberness herself recommends these...and she is absolutely 100% dead on in her recommendation. These feel elegant to the touch. Other things that I think make this an elegant card? The color purple. Purple is the color of royalty and is my absolute favorite color. I also think that all of the beautiful white space and no layers make this card simply elegant. The only thing that I would have done differently, would have been to use a satin or silk ribbon. Guess I need to go shopping. :-)

The technique I used is watercolor stamping. I thoroughly misted the front of this card with water and let the water soak in while I inked up my stamp. I used my SU markers in Old Olive, Lavender Lace, and Elegant Eggplant to ink up the solid image from Petal Prints. I then just stamped the image twice without reinking. I then used my heat gun to speed up the drying process. Once dry, I overstamped the outline image with Versamark and then sprinkled with Ultra Thick Embossing Powder. This gave the impression of dew drops. I then applied a little crystal stickles in a few strategic places for a little extra touch. The Olive organdy was heated with my heat gun also to ruffle it a little.

7.28.2007

Dare to Get Dirty Flourished Floral


Here is another card that I made for one of the Dare to Get Dirty challenges over on Splitcoast. This is for Genie1314's sketch from the first day.

This card was so easy...it almost felt like cheating while I was making it. I had an awesome sketch to work with and then I had an awesome new find to play with. That find being Penny Black stickers. The floral image, the striped piece on the bottom, and the long white flourished piece on the side is all a sticker. I'm going to have to go back and acquire a few more.

Archivers has beautiful shimmery colored cardstock (like SU's shimmery white, except colored). The colors used for this card are Antique Gold, Bronze Jewel, and Ruby Jewel. Does anyone know where one can purchase packs of this stuff? The company who makes it is 'The Paper Company'. I also used SU Rose Red for some of the panels to brighten things up. The sticker images are finished off with some Crystal and Goldenrod stickles for a little shimmer. A beautiful aged copper decorative brad finishes of the card.

Dare to Get Dirty Wanted


This is another card that I made for the Dare to Get Dirty challenges over on Splitcoast. This is another multi-tasking card...a necessity in my house (I say this as I hear my oldest son yelling MOM...come downstairs). This combines Julia's sketch challenge and TexasJodyLynn's brad challenge.

The card is 5 1/2 square and is hinged on the left side. I used a bunch of aged copper brads. I tend to hoard all my embellishments and this card really felt good to make. Brads AND designer paper all on one card. LOL!

Card uses the new SU Wanted set and the Outlaw designer series paper. Some edges of the designer paper are roughed up and sponged with Chocolate Chip classic ink. The Horse, Star and Wanted were stamped with Versamark and embossed with Detail Black embossing powder. Piercing along the right side completes the card.

I hope to make up for lost time this last week or so with some of these challenges, so stay tuned for more creations! :-)

Seeing Pink Elephants?


I made this for the Dare To Get Dirty Challenges over on Splitcoast. I've actually had this idea (i.e. Pink Elephant with a Martini since I participated in one of Jami Sibleys new catalog swaps last year). I'm having to multi-task and combine challenges. This was created for both Cambria's and Cindy's challenges.

I had to resort to embossing on the acetate sheet as I didn't have any Pink Staz-On. You can't see it in the photo but the Pretty in Pink layer is stamped with Linen. Everything else is stamped on Shimmery White. The little elephants ear is popped up with a dimensional and there are pink rhinestones in the center of the little flowers. I tied a little martini pewter charm to the ribbon and on the inside of the card I have some martini shaped bling. Here's a view of the inside of the card.


7.25.2007

An update...

Hi Cyber friends and fellow stamper artists! The whole Nicholson household has been stricken by a bad case of the flu (even poor mom who still needs to take care of everyone). I've got a few cards to post and I've been tagged by a few others. It will have to wait a day or so until I have my energy back.

I will be doing the Acetate card tutorial in August for Splitcoast. This will be a small way that I can contribute to a site that has given me so much.

Linda

7.14.2007

Butterflies on Vellum

Julia Stainton made a beautiful card (but when does she NOT make a beautiful card) a little while back for her daughter in which she used SU's cardstock vellum as the card base. If you have never heard of Julia, you will be in for a treat for the eyes. Here's a link to her blog Belle Papier (translation Pretty Paper). Her blog is aptly named.

Julia advised that the VersaMagic Multi-surface Chalk Inks were made to stamp on vellum and dry quickly. I happen to own a few due to all the enabling that goes on over at Splitcoast, so I thought "Hey...instead of hoarding my stuff, maybe I should actually use it and give one of these vellum cards a whirl!" ;-) I'm glad I did . I also used for the very first time my Papertrey Ink Butterfly Kisses stamp set.

I stamped the butterflies with two different colors of chalk ink. Once dry, I overstamped the straight line image in Versamark and then embossed with detail white embossing powder. I cut the butterflies out and mounted on dimensionals on a Shimmery White panel that was embossed with the Cuttlebug Tiny Bubbles embossing folder.


Stamp sets used: Papertrey Ink Butterfly Kisses


Cardstock used: CS weight vellum, Shimmery White, Soft Sky


Ink used: Versamagic Aspen Mist, Pretty Petunia, Spring Pansy, Versamark


Accesories: Detail White EP, Cuttlebug, Tiny Bubbles embossing folder, dimensionals


7.13.2007

Acetate card

I've had a lot of requests for directions on how to make an acetate card. I'm going to attempt a tutorial on my blog in the next few days so you can have a visual of how these go together. :-)

Please bear with me as I've never done this before.

Linda

7.11.2007

Casing Ellen


One of my favorite enablers...um make that artists is running a contest on her blog. That artist (and enabler extradinaire) is none other than Ellen Hutson. The contest is to use one of her recent layouts and stamp a card with a Lockhart image. None of us know what the prize is, but Ellen promises that it will be good. :-)


I just adore this Roses and Daisies Lockhart stamp from the La Fleur Couture line. I think the La Fleur Couture and the Veggie Couture stamps are just a brilliant concept. Ellen has made some of the most beautiful and elegant cards that I have ever seen with these stamps. If you haven't ever checked out Ellen's blog, I would highly recommend paying her a visit.


I wish my photo did better justice to how shimmery this little beauty is. The cardstock is SU's Shimmery White. In addition to that, I used my Sakura glitter pens (pink and clear) to highlight portions of the dress. Alas, it is cloudy and overcast here in Colorado, and this is the best picture that I could produce.

Stamp set used: Roses and Daisies
(Lockhart)

Cardstock: Shimmery White, Very Vanilla
Ink: Timber Brown Staz-On, Certainly Celery, Pretty in
Pink

Accessories: Dots embossing template (SU), Scor-It,
Marvy Oval Scallop Punch, Celery Organdy, dimensionals, Sakura clear and pink
glitter pens

7.01.2007

And speaking of the birthday boy!


Here is my little birthday boy in all his blonde haired, blue eyed glory!

Doodle on Acetate

I have to say that I really like how this card turned out. I started out not really having a purpose for this card in mind, it was purely fun stamping (which is the best kind). When I was finished with it, I knew this card would have a special purpose (a much needed, long overdue Thank You).
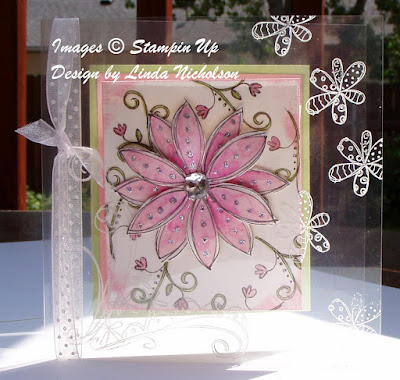
The card base is a 5 1/4 inch square acetate card. I stamped the big flourish from Doodle This in the lower left corner (don't know how well you can see it in the photo, acetate cards are a bugger to photograph) with white Staz-On and then stamped the flower from Doodle that randomly along the right edge of the card. I stamped the large flower from Doodle This twice on Shimmery White CS and then watercolored using my watercolor crayons and an aquapainter. I then outlined the flowers with my Sakura glitter pen and then added Dazzling Diamonds to the dots on the flower. I cut out each flower and used a pencil to curl the petals of the top most flower. I mounted the flower with the curled petals on top of the other cut out flower and added a big Jewel in the center and set the piece aside. I then stamped the smaller flourishy flower from Doodle That on a piece of Shimmery White cardstock and colored in with Pretty in Pink and Certainly Celery markers. I highlighted the pink flowers with my glitter pen.

The trickiest thing about acetate cards is to attach everything without your adhesive showing. I first positioned and attached the cut out flower in the center of my card using glue lines. On the inside of the card (underneath the flower), I then added more glue lines and centered my stamped panel with the colored flowers underneath. On the backside of the card, I mounted a Pretty in Pink panel to a Certainly Celery panel and attached with Glue dots. On the inside of the card (back panel), I then attached a Shimmery White panel (cut the same size as the white panel that you see on the front of the card) and positioned it just so.
When the card is closed, all you see is the beautiful shimmery flower with the one stamped Shimmery White panel that appears to be matted with Pink and Celery. I may just need to make another one of these for myself to keep! :-)

C-man's Birthday Card


This is the card that I made for my youngest son for his 4th Birthday. I couldn't resist the Crab & Co borg over on SCS and I have to say I'm happy that I purchased this set. I can see myself and my boys having a lot of fun with it in the future.


I stamped all of the images in Timber Brown Staz-On on Shimmery White CS (I find this CS holds up to watercoloring quite well) and colored all of the critters with my watercolor crayons. The sand and the sky are colored with Twinkling H2O's. I love how shimmery these paints are and they are so easy to use. I then stamped a few random spots on the sand with my Itty Bitty Backgrounds set and then selectively highlighted a few spots with my glue pen and dazzling diamonds. I matted the entire panel with Basic Black and then Real Red. The entire panel is then mounted to a 5 1/4 inch square card made from Cool Caribbean. The '4' is from a Basic Grey self adhesive numbers set that I purchased. I colored the chipboard with my Craft Black pad.

6.29.2007

I stamped!

This is a birthday card that I'm sending to a stamper that I have long admired. Boy does it feel good to stamp! I've been missing it. I still have to make a birthday card for my son (my youngest turns 4 tomorrow) and a birthday card and matching gift bag for my best friend. I'm also going to attempt to make a 'Swimming Pool' ice cream cake for the festivities tomorrow. Wish me luck!

The card above is my very first acetate card. The trickiest thing about acetate cards (besides photographing them) is adhering your layers so your adhesive does not show. The stamped images are from one of my favorite retiring sets (that I'll hold on to forever) called Mixed Bouquet. I stamped the smaller daisy image using White Staz-On on the transparency itself. I stamped the larger rose image on Shimmery White using Pixie Dust Versamagic chalk ink. The image was then embossed with Irridescent Ice ep and then watercolored with banana and pink crayons. The patterned paper is some of my favorite Crate paper called Twirl. I highlighted some of the stripes with my Sakura glitter pen. This beauty shimmers like crazy (and the gal I'm sending this too LOVES shimmer)! I wish you could see it IRL. I tied some pretty green polka dotted ribbon and then hung a little CB tag that I made and stamped it with an image from It's Your Birthday.

Hope you all have a wonderful day!


6.17.2007

DH's Father's Day Card


Well, I was up late again last night stamping and dodging the inevitable Miller Moth again (yuck)! This is what I created for my DH for his Father's Day card.

I just recently purchased this Classic Pickups set from SU. I knew that I would regret not purchasing it before it retired (and I really didn't realize this until last night when I started to play with it). I never purchased Classic Convertibles before it retired, and I'm still looking to find it at a reasonable price.

This is a Gatefold card that I learned to make from Beate. The only thing that I haven't figured out yet is how to keep the card closed (so excuse my finger in the picture). The image is stamped with Black Staz-On on Watercolor paper. I used a mixture of my watercolor crayons and reinkers to color the image. I will never become an airbrush artist for hot rods, but I think my flames look OK! ;-) I used a silver metallic pencil for all the grillwork, rims and headlights and went over the windshield with a Sakura clear glaze pen. I sponged the edges with Buckaroo Blue and then used Classic Black DTP lightly on the edges. The black panels behind the truck were stamped in Versamark with the Paisley backgrounder from CHF and then embossed in detail black on black (love this look...I learned it from Lindsey!). I then added some Pewter Hodgepodge Hardware (couldn't put girly bling on a masculine card) for accents. I used my Cuttlebug to cut the little tag and sponged Buckaroo Blue all over, and stamped FD in my Rough Edges Alphabet. Finished with just the smallest little strip of Black Organdy.

Thanks for stopping by!

Stamps: Classic Pickups & Rough Edges Alphabet (SU), Paisley backgrounder (CHF)

Cardstock: Buckaroo Blue, Basic Black, watercolor paper

Ink: Versamark, Black Staz-On, Buckaroo Blue (reinker)

Accessories: Pewter HPH, Black Organdy, Sponges, WWC, Aquapainter, Detail Black EP, Sakura Clear Glaze pen

6.15.2007

Little Lady


I made this for one of the Wish RAK gift exchanges over on Splitcoast. This was for a secret color exchange. The person who I was given to RAK, listed Blue as one of her favorite color choice. Boy did I ever have fun shopping for her. I didn't have the time to make as many altered items as I would have liked (I have been putting in some major overtime at work the past few weeks), but I thought I would post here what I did manage to make.
I made my secret color friend a little mini book with my Bind It All along with a matching card. I just love this patterned paper by Die Cuts With a View. It already has glittered accents all over it and has such a playful pattern. I thought it was high time I broke in my Little Lady set that I purchased from Papertrey. This is my first venture into acrylic stamps and I have to say that I really like the quality of these stamps. They really take the SU classic dye ink beautifully! I used the white card stock that Papertrey also sells for my card base as it has a nice weight to it. I layered on some SU Real Red with the patterned paper on top. I stamped the sentiment, antennae, and bug trail directly on top of the patterned paper. The Ladybug was stamped and cut out and mounted on top of the patterned paper. I added some Black Diamond stickles on top of the Ladybug spots for a little extra bling (although you can't see it in the photo...which was taken at 6:00 AM right as I was walking out the door to go to work).
Thanks for visiting!

6.11.2007

Hula Cat (or the lengths one will go for art)!


One thing about "Stamping in the Moonlight", particularly this time of the year in Colorado Springs is that there are these nasty little moths buzzing around your head (they like the bright lights us stampers like to use). As us Coloradoan's would say "It's Miller Time"! If it wasn't for the fact that I admire the person who posted this Gatefold challenge, I would have thrown in the towel to avoid being pelted by these foul little insects. Where is my cat now that I need him most?

Stamps are from the newest Cat's Pajamas release (Hula Cat and Fun in the Sun plus 3 Small Flowers on the inside). Cardstock is Pink Passion, Wild Wasabi (I just love this new color!) and Shimmery White. Patterned paper is by Flair Designs (their new beach line). Hula Cat is stamped with Staz-On and watercolored and then I used my Gelly Roll pens to add a little shimmer. I cut out Hula Cat with my Creative Memories cutting system and mounted to a Giga Scalloped oval. Finished off with some Prima Daisy's and a little bling.

6.10.2007

Nature's beauty!


No cards to share with you today, but I thought that I would share with you something beautiful! This beauty opened late yesterday afternoon. My Peony plant started as a bare root that I ordered from Brecks about 8 years ago. It has only produced blooms for the last 3 years. Has the 5 year wait been worth it? YOU BET! I believe that Brecks called this a Sorbet peony (it is supposed to have pink and cream tones). Hope to have some cards to share with you soon (definately one for Beate's challenge). I've been working a lot of overtime these past few weeks and my time at home with my two little ones becomes even more precious. I've been leaving for work at 6:00 am and getting home at around 6:00 pm, so sleep has been precious too! Thanks for stopping by!

6.03.2007

I scream, you scream....


I am so happy with how this card turned out! I made this for Beate's sketch challenge over on her blog.


I LOVE this cute little Penny Black froggy (I have several of these cute frog images). I stamped the frog in Staz-On Black on Shimmery White cardstock. Colored w/my aquapainter and watercolor crayons and used markers to shade a little. A touch of dazzling diamonds gives the froggy's tummy and ice cream some sparkle. I stamped the Dots & Daisies background in Pixie Pink craft on Gable Green cardstock and embossed with Irridescent Ice embossing powder and rounded the edges. The Dotted background is stamped in Pixie Pink on Shimmery White and then ran through my Cuttlebug Blooms embossing folder. I attached the Gable Green layer to the Shimmery White layer, and all was placed on a 5 1/4 sized Gable Green square card base. I cut the Frog out with my Creative Memories circle cutter and mounted this to a Pixie Pink scalloped Circle. Attached the frog with dimensionals. The Daisies came from one of TexasJodylynn's Prima shares. Topped this with some Doodlebug bling.


This is a cool technique called Acetate Frost that I learned by being a Technique Junkies subscriber. This particular card uses Tim Holtz Alcohol inks (Farmers Market collection). I blatantly cased this particular design from Leigh O'Brien (as I had never used Alcohol inks before, I didn't want to have to think about anything else). I just love the bright vivid colors produced from these inks! I'm going to have to expand my collection (good use for my M's 40% off coupon). LOL!

Stamps: It's About Time, Well Worn Words

Cardstock: Basic Black, Rose Red, Whisper White, Acetate

Inks: Black Staz-On, Craft White, Farmers Market

Technique: Acetate Frost

5.28.2007

I've been tagged!

I've been tagged by none other than the bad girl herself (aka Sherry Cheever)! The object is to give one word answers (and seeing as how I like to talk (both with my mouth and hands)) you can imagine how difficult this is for me. You can only type one word. No explanations…
Yourself: busy

Your Partner: wonderful
Your Hair: colored
Your Mother: dependable
Your Father: dreamer
Your Favorite Item: computer
Your Dream Last Night: nonexistant
Your Favorite Drink: coke
Your Dream Car: bmw
Dream Home: mountain
The Room You Are In: office
Your Fear: bees
Where You Want to be in Ten Years: retired
Who You Hung Out With Last Night: cat
You’re Not: selfish
One of Your Wish List Items: Italy
The Last Thing You Did: laundry
you Are Wearing: cat
Your Favorite Weather: warm
Your Favorite Book: Potter
Last Thing You Ate: mexican
Your Life: busy
Your Mood: content
Your Best Friend: Shuana
What Are You Thinking About Right Now: bed
Your Car: Subaru
What Are You Doing At The Moment: tag
Relationship Status: married
What Is On Your TV: nothing
What Is The Weather Like: muggy
When Is The Last Time You Laughed: today


This is a new game of tag. Let me know your one word answers. You can link back here in the comments, so I can check them out!
I suppose I should now tag someone else!
Lindsey, Julee, Cindy, Beate, and Leslie.

5.27.2007

Glamour Puss


Here is my contribution to Beate's Friday challenge!
I absolutely LOVE Cat's Pajamas rubber stamps! This is Spinkle and she is wearing her crown.
Card base is SU Basic Black. I used one of the prints from my favorite Basic Grey Phoebe 6x6 pack as the first layer. I then used my new Cuttlebug Spots & Dots embossing folder on Cool Caribbean. I rounded the corners and selectively enhanced a few spots with my Stardust pen to make them shimmer. Sprinkle's crown, eyes, and collar are colored in with Stardust pens too! Sprinkle is mounted on a Giga scalloped punch that has been enhanced with some pink bling. This card is so much better IRL! I need to work on my photography skills. LOL!
Thanks for the challenge Beate! I had a lot of fun with this one!

5.26.2007

First Bind It All creation


I recently purchased a Bind It All over at Eclectic Paperie and this is my very first creation with it. I was so excited just to make this that I forgot to round the corners of my inside pages. I went in after the fact and rounded what corners I could. LOL!

I made this little book to keep track of all my stamp supply purchases. I find that the older I get, the more these types of things come in handy. I really blame my two boys for my lack of brain cells these days. I think they sucked quite a bit of my intelligence when they were in the womb! They are two smart little cookies!

I stamped Doodle This on Shimmery White and also on Basic Grey Phoebe. I cut out both images and layered one on top of the other. Both images are glitzed with Lime and Fruit Punch Stickles. Bling in the center is by Doodlebug. The book itself is two coasters that I covered with more Phoebe paper (inside is the distressed pink from the collection). I traced many of the lines on the front cover with Stickles too. Punched my holes with the BIA, set my coil and tied on a bunch of pretty ribbon.

No more dual purchases for me! That is, as long as I remember to tuck this little book into my purse. :-)

My muse....


Any stamper that I know will always indulge themselves in a certain type of stamp. For example, I love flowers! If I see a flower stamp that I want, I purchase it . No buyers remorse...no guilt...I just purchase it. I purchase it because I know that I will love it. The same holds true for me with stamps with Cat images.

I want you to meet my Muse for anything Cat related that will be uploaded to this blog. Meet Rocky! We adopted Rocky about 9 months ago from our local shelter. Rocky is now officially a year old, but still very much a kitten. My stamp room and office are located on the 2cd floor of my house. Rocky just peeked in on me from my 2cd story window (he has taken to getting on the roof of my house in his relentless pursuit of birds). Rocky will often hang out with me in my stamp room when I am creating or on the computer. He does a wonderful job warming my feet on cold winter nights here in Colorado.

I couldn't resist purchasing this particular cat image from Cherry Pie Art Stamps when I saw it. See the similarity?
I had made this card for the March VSN over at Splitcoast. The cat is stamped with Versamark ink on Shimmery White paper and embossed with Detail Black embossing powder. I aged the Shimmery White paper with my Distress Inks (LOVE them).
Card details:
Stamps: Chat Noir - Cherry Pie Art Stamps, Paris - Cavallini, French Script - SU
Paper: Certainly Celery, Rose Red, Shimmery White, Basic Grey Perhaps
Ink: Chocolate Chip, Versamark, Antique Linen & Tea Dye (Tim Holtz Distress Ink)
Accessories: Detail Black ep, Aged Copper Hardware, Celery organdy ribbon
 
site design by designer blogs