Pages

11.25.2013

November Papertrey Ink Blog Hop


This month Nichole challenged us to make little glitter houses.  Can I just say, I am officially hooked!  I have a Pinterest board devoted to these little beauties.  If you do a search for Christmas glitter house or Putz house online, you are sure to fall in love too.  There are even some web sites that have free pattern where you can cut your house pattern from thin chipboard (like a cereal box).

Christmas Village


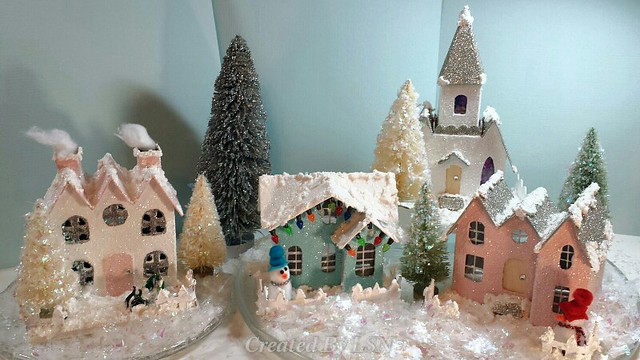
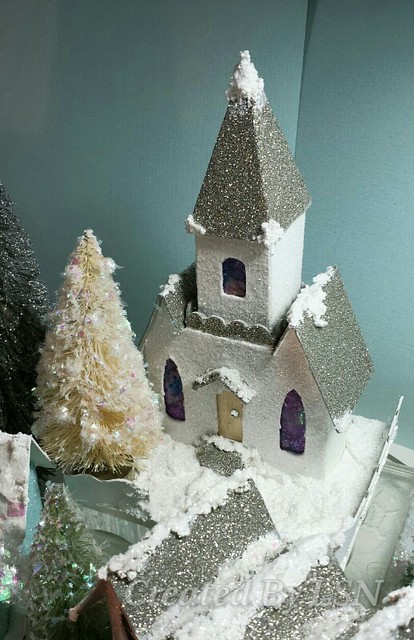
So what do you think?  My favorite is the church.

Church detail


Little Blue House
Blue house detail


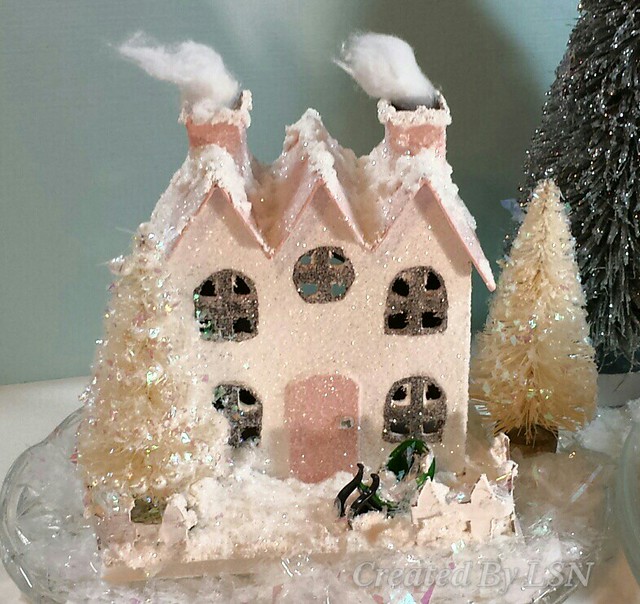
Pink House w/White Gold Roof
Pink House detail


White house w/Pink Roof
White house detail


I purchased my glitter houses from a site called Little Village Houses. I am not to steady with an Xacto knife so I saved myself a step and was able to just get down to decorating and having fun!  I also purchased my fences, sisal trees, and some cute little sisal wreaths from there too.  Fast shipping, well packed, and reasonably priced.

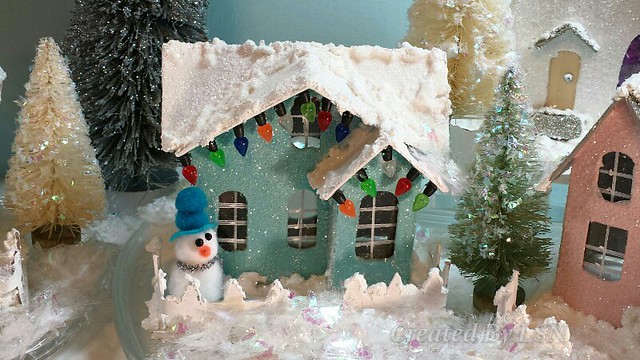
Each house got two base coats of gesso and then a couple of coats of acrylic paint.  I tried choosing paint color  that would mimic Sweet Blush, Aqua Mist, and Smokey Shadow.  Each house then got a good coat of glitter (Martha Stewart course glitter and White Gold glitter for the silver roof tops).  For the "snow", I found a wonderful product called Snow-Tex by DecoArt.  My little window panes use PTI's Faux Ribbon stamp set with White Staz-On stamped on their acetate.  For the church, I used some alcohol inks and the tissue that PTI wraps their orders in to make stained glass windows.  The ornaments on the cream trees (that you can't see too well now because of all the Mica flakes) are pearls that I picked up at Michaels.  I also found my snowmen and sleigh in the mini tree section of M's too.  If you have any questions on anything, just let me know and I'll be happy to answer.

Now off you go to look at more beautiful creations from all our PTI friends!  Thanks for stopping by!

Linda

11.06.2013

December Daily Cover

Hello everyone!

I've started preparations for my 2013 December Daily.  I was able to actually make a December Daily last year (I would say it is 90% finished, just need to journal a couple of pages, reprint a few photos in different sizes (as I want to use a different page protector configuration) and embellish a little more on a few pages.)

Once again I'm using a red SN@P album by simple stories.  I'm absolutely in love with the chalkboard trend right now and this is what I decided to go with.  I used was hi tape to mask off the red fabric portion and painted the kraft base with Martha Stewart black chalkboard paint (I did two coats, letting the first coat dry 1 hour before painting again.  I then let it all cure a full 24 hours before doing anything else).  I then stamped Tim Holtz's Grunge Snowflakes with Versamark and then used detail white embossing powder to get all those pretty white snowflakes (I was also pleasantly surprised at how cool the chalkboard looked just rubbing my embossing buddy all over)!  I then used my Fresh Snow ink from PTI to distress the edges and cover a bit.  Once the white ink was dry, I just adhered some red glitter tape over the seam where the red fabric of the album and the chalkboard meet.


I'm still undecided as to whether I should further embellish the cover or not (I'm having a hard time covering up those pretty snowflakes).  What do you think?  Leave it as is or add a little more (maybe a die cut snowflake with a 2013 or 25 flair button)?

I'm semi working on prepping the interior pages.  I find that I really need the pictures to be inspired.  I know that I will be having a lot of clear accents in my album, as I like to see other pages peeking through behind each other.  I'm also got a list in my mind of what I'll be including for most days of the album, but you never know what stories/surprises will pop up (like when both of my kids came home with Shining Star awards last year for exemplifying the character word "kindness" for the month of December at school).

Linda

 
site design by designer blogs